| Provider Type(s) for Which These Instructions Apply | Program(s) for Which These Instructions Apply |
|---|---|
| Provider Authorized Signature Person | ADvantage Waiver State Plan Personal Care |
The steps in this document will help guide the Provider in the annual update process. These steps must be followed between June 1st and June 30th of each year. An update must be completed for each certified Provider record in Harmony AND for each service on that Provider record. These steps should be completed using the Provider Restricted Access role in Harmony.
- Log into Harmony
Select “Provider Restricted Access” in the Role drop down list in the right upper corner of the My Harmony Chapter.
Select “Go”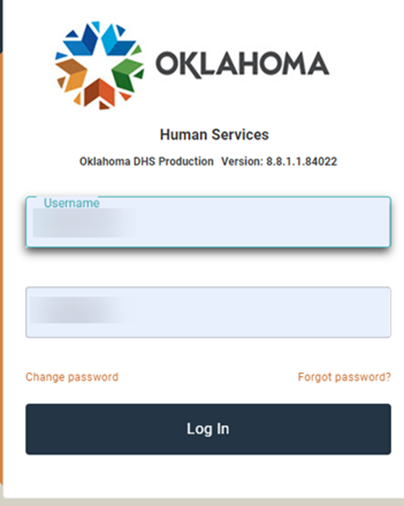

*If the user has not logged into Harmony in over 45 days a new Access Request will be required.
**Provider agency users who become locked out of the Harmony Production Site will need to call 405-522-5050, and select Option 1 for English, then Option 4, then Option 2, then Option 4 again to speak with a Medicaid Services Unit (MSU) representative. Callers will need to provide their agency name and branch if applicable along with their full name and be prepared to validate their security question at the time of the call. The Password Reset phone line will be open Monday through Friday 8am to 5pm excluding state holidays.
***The user will need to change their role to “Provider Restricted Access” if that is not the default. - Select the Providers Chapter

- Select the Provider Record you want to work on.
*If the user is associated to more than one provider record a list of records will display.
Note: An Annual Provider Update will be required for each Provider record AND for each service on the Provider record.
- Select the Documents Tab
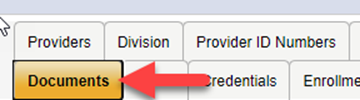
- Hover over File
Select “Add Documents”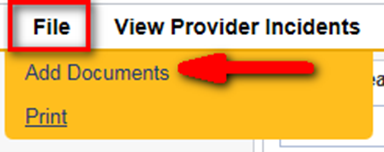
- Select “Annual Provider Update” from the drop-down options
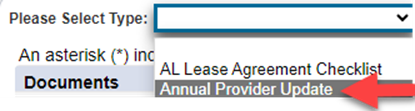
- Update Reason for Action = Annual
Leave Document Status = Draft, until step 17 is completed.
Hover over File
Select “Save Documents”
Complete all fields of the document
*Complete: Authorized Signature Person Affirmation, Part A: General, Part B: Administrative and Documents Needed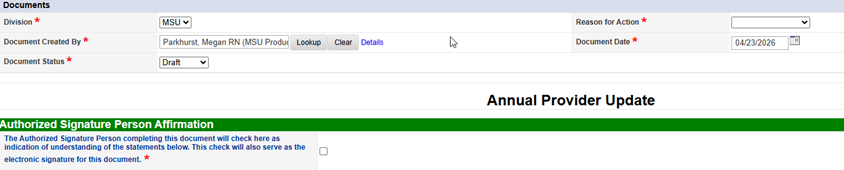
- Under the Documents Needed section, make note of the list of documents required for your Provider Type.

- At the top of the page in the “Part A General” section, click on the link to obtain the COPP’s and Service Standards.

- Open one document at a time
In the top right-hand corner of each document select either the print or save icon.
If printing, a wet signature should be added, then the entire document should be scanned back into your computer for upload into Harmony. When naming the document ensure there are no special characters such as a . or , in the saved name.
If saving, an electronic signature should be added and saved on your computer for upload back to Harmony.*Only a certified electronic signature is acceptable.
*Click the back arrow to return to the Harmony document.
**The full document and not just the signature page must be saved and uploaded into Harmony.
***If there are multiple branches, a single document may be signed on behalf of the entire agency and uploaded to each branch provider record. - On the “Annual Provider Update” document
Hover over File
Select “Save and Close Documents”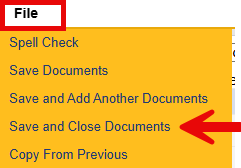
* Each document requires its own Note. Please do not upload all of the documents under one note. The documents should be saved seperately and attached individually using a specific Note Sub-Type that describes the document being attached.
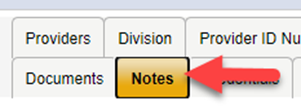
**Providers with multiple locations may upload the same document to each provider record in Harmony. When signing documents use the Provider name and not specific locations. - Select the Notes Tab
- Hover over File
Select “Add Notes”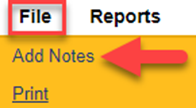
- Select the Note Type = Annual Provider Update
Select the Note Sub-Type of the first attachment you want to upload.
Update Status = Complete
Click on Add Attachment
Note: Not all Note Sub-Types will be used. Only those that are identified as required on the Annual Provider Update document for the Provider Type you selected.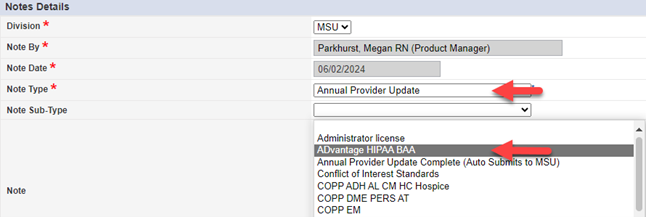
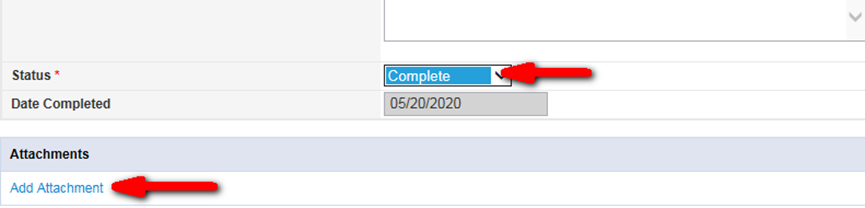
- Select “Choose File”
Browse your computer for the folder where the document was saved or uploaded after the signature was added.
Select the corresponding scanned document for the note sub-type selected.
Click “Upload”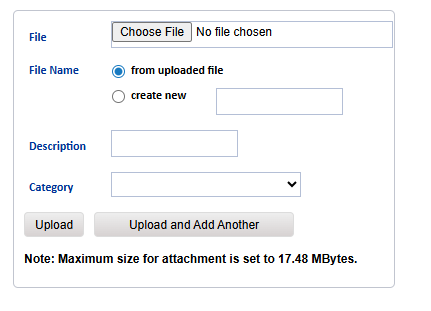
- Hover over File
Select “Save and Close Notes”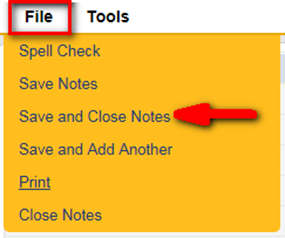
Repeat Steps 13 to 16 for all documents that are required to be uploaded according to the Annual Provider Update document.
Once all required documents are uploaded proceed with step 17.Once all documents have been uploaded, return to the Documents tab and open the Annual Provider Update to verify it has been fully completed. This includes checking the boxes in the Documents Needed section to indicate which documents were uploaded to the Notes tab AND checking the box to confirm the “Authorized Signature Person Affirmation”.
After verification, update the document status to “Complete.” Then, hover over File and select “Save and Close Documents” to save the document with a status of Complete. - On the Notes Tab:
Add a note with Note Type = Annual provider Update and Note Sub-Type = Annual Provider Update Complete (Auto Submits to MSU)
*Make sure to hover over File and select Save and Close Notes to ensure the notice auto generates to MSU.
**If this step is not completed MSU will not be aware of the Annual Provider Update submission.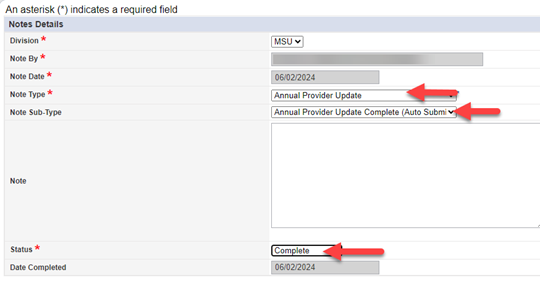
This completes the Annual Provider Update
*Reminder that an Annual Provider Update is required for each certified Provider Record in Harmony AND each service provided.
Note: To verify that MSU has processed your agency’s Annual Provider Update, go to Provider Prime, open your Provider Record, select Edit under the Providers tab, and check the “Annual Provider Update Completed for FY” field. Once finalized by MSU, the upcoming FY will appear in the box to the right (e.g., in July 2026, it should display FY 27).